
Lighting a Tent for Outdoor Events: Simple Starting Points
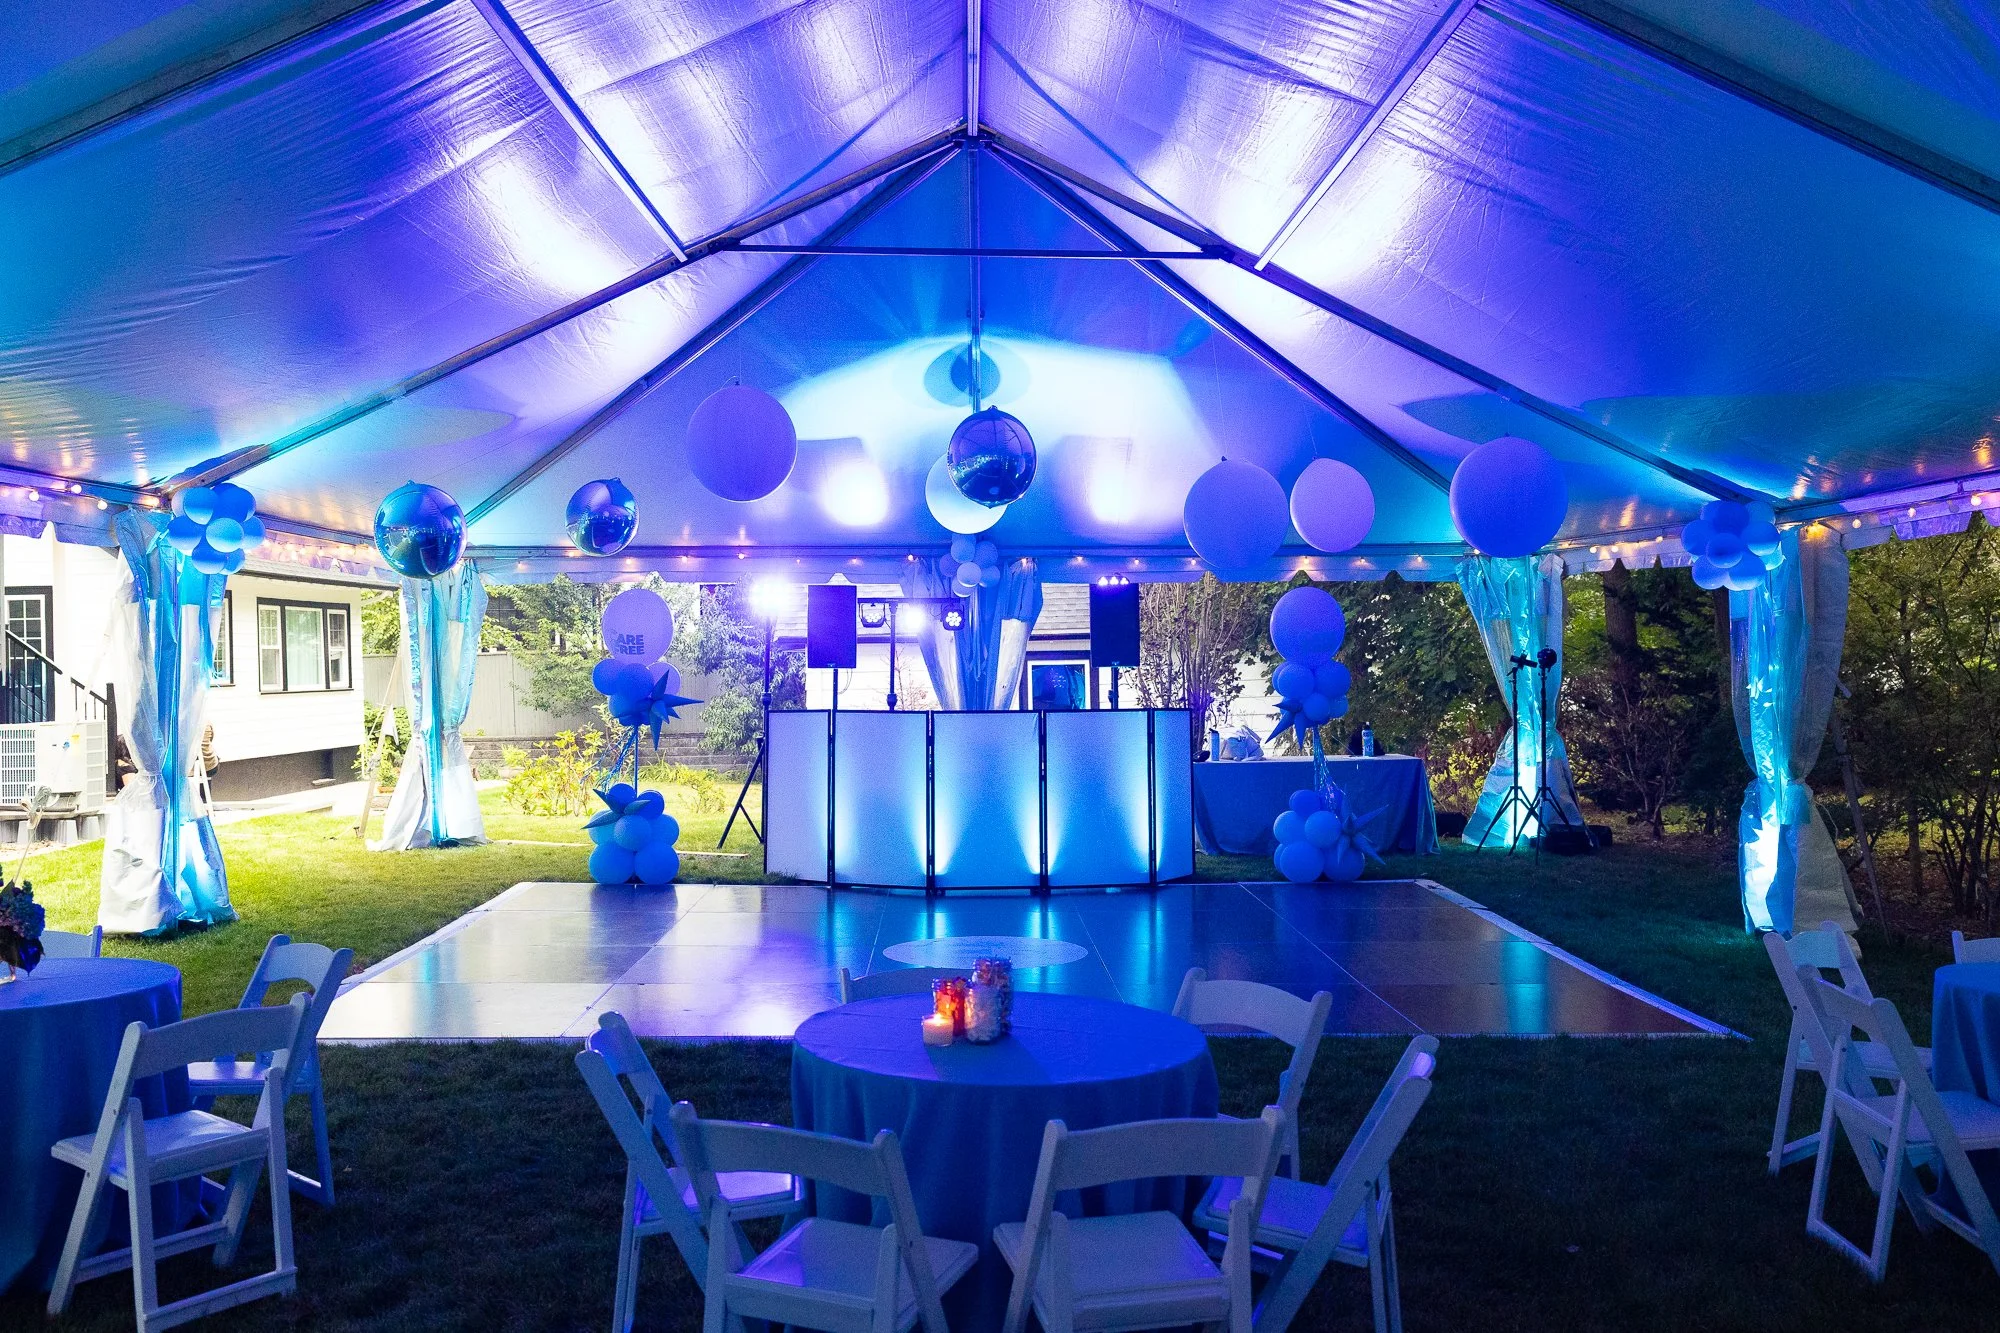
Image: Planner Rachel Glazer | Photo Robert Castagna | Siagel Productions
Lighting a Tent for Outdoor Events: Simple Starting Points
Lighting a ballroom is fairly straightforward—you can rely on predictable layers to add energy, depth, and atmosphere. But lighting a tented outdoor event is a different challenge. Suddenly, factors like weather, time of day, and whether the tent walls will be up or rolled open come into play. This guide is meant for clients who are just starting to think about lighting their tent. While our team provides complex, customized lighting designs, we’ll keep it simple here and share a few essential tips to make your event glow.
Step One: Functional Illumination
Every space needs baseline lighting so guests can see and move around safely. Indoors, this is a given—but in a tent, it’s not always thoughtfully planned. Tent companies may include simple options like bright work lights or perimeter bistro strands, but these rarely create the atmosphere most clients want.
Tip: Always confirm what lighting is included with your tent rental. Then decide whether to supplement—or replace it—with a plan that balances both function and ambiance.
Step Two: Wash the Space
The two most common lighting tools for tents are uplights and ceiling washers:
Uplighting: Fixtures placed on the ground to illuminate tent walls or poles. Uplighting instantly transforms plain canvas walls into a glowing backdrop. But if your tent walls are rolled up on a nice evening, uplighting becomes less effective.
Ceiling Washers: Fixtures mounted higher up to project across the tent’s ceiling. These are often more reliable in tents since they don’t depend on sidewalls.
In most cases, a combination of uplighting and ceiling washing works best—giving your technician the flexibility to adjust for weather, layout, and atmosphere.
Step Three: Plan for Weather
If you’re considering outdoor or landscape lighting, keep in mind that many entry-level uplights aren’t weatherproof. Rain can cancel part of your plan unless you invest in higher-end, weather-rated fixtures. Always have a backup plan in case inclement weather forces changes.
Step Four: Add Layers of Impact
Once you’ve created your base layer, you can add features that make the tent feel more dynamic:
Color Washes: Change the mood with different hues.
Gobos & Monograms: Project patterns or personalized designs on the white canvas ceiling.
Intelligent Lighting: Programmable fixtures that move, shift colors, or animate the dance floor.
Pin Spotting: Focused beams that highlight centerpieces, floral displays, or food stations so they don’t disappear into shadows.
The Takeaway
Lighting a tent requires more thought than simply plugging in a few bistro strands. By combining uplighting and ceiling washers, planning for weather, and adding accent layers like gobos or pin spots, you can turn a plain tent into an unforgettable environment.
This is just a starting point—once you’re ready to go beyond the basics, there are endless possibilities to make your event shine.
Good luck out there!
Michael Siagel